Curious about growing potatoes in containers? It’s easier than you think! With the right tips, you can enjoy a bountiful harvest, even in small spaces. At GoGardenPro, we’re here to guide you through every step of the process. Let’s dive in and get your container gardening journey started!
Contents
- 1 Selecting Containers for Your Potato Plants
- 2 Planting Potatoes in Containers: A Step-by-Step Guide
- 3 Troubleshooting Common Problems with Container Potatoes
- 4 Additional Tips and Tricks for Successful Container Potato Gardening
- 5 Harvesting Your Homegrown Potatoes
- 6 FAQs about growing potatoes in containers
- 6.1 Can I grow different varieties of potatoes in containers?
- 6.2 What kind of container do I need for potatoes?
- 6.3 What type of potato is best for containers?
- 6.4 What kind of soil do I need for container potatoes?
- 6.5 How much sun do container potatoes need?
- 6.6 How often should I water my container potatoes?
- 6.7 Do I need to fertilize my container potatoes?
- 6.8 How long does it take to grow potatoes in containers?
- 6.9 How do I harvest potatoes in containers?
- 6.10 Can I get a second harvest from my container potatoes?
- 7 Conclusion
Selecting Containers for Your Potato Plants

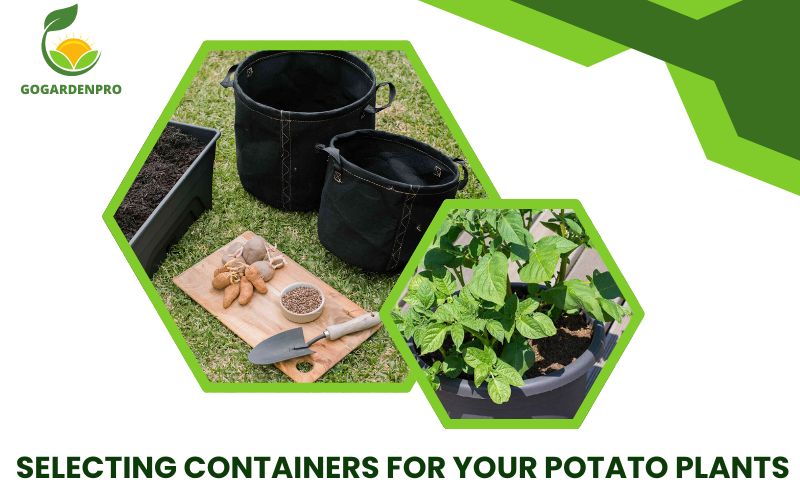
Types of Containers Suitable for Potatoes
- Fabric Pots: Highly recommended for growing container potatoes. They are breathable, which helps prevent overwatering and allows for good air circulation around the roots. Fabric pots are also lightweight and easy to move.
- Plastic Pots and Buckets: An economical choice for container potato gardening. Ensure they have adequate drainage holes. If not, you’ll need to drill some yourself to prevent waterlogging.
- Wooden Containers: Aesthetically pleasing and sturdy, these offer good insulation but can be heavy when filled with soil. Ensure proper drainage and avoid using pressure-treated wood, which can leach chemicals.
- Grow Bags: Specifically designed for growing potatoes in containers, these bags are typically made from breathable fabric and often come with flaps for easy harvesting.
Choosing the Right Size
- For small or medium potato varieties, a container with a depth of at least 12-15 inches and a width of 18 inches is suitable. This allows ample space for the tubers to develop.
- For larger varieties, or if you plan to plant multiple seed potatoes in one container, opt for something larger, around 20-24 inches deep and wide.
Considerations for Drainage and Mobility
- Ensure containers have multiple drainage holes.
- Use gravel at the base to prevent soil escape.
- Consider containers with wheels or use a plant caddy for mobility.
Preparing Your Container
Before planting, ensure your container is ready to promote the best growth environment:
- Fill your container with a high-quality potting mix specifically designed for container grown potatoes. Avoid garden soil as it can be too dense and may contain pathogens.
- Mix in a slow-release fertilizer to provide nutrients throughout the growing season. Be cautious with the amount — too much can harm your plants.
- Consider adding a layer of mulch on top of the soil after planting. This will help retain moisture and suppress weeds.
Planting Potatoes in Containers: A Step-by-Step Guide
So you’ve chosen the perfect potato container, and your urban spud adventure is about to take root! Now comes the exciting part: planting your seed potatoes. Here’s a step-by-step guide to planting potatoes in containers, transforming your balcony or patio into a potato paradise.
Step 1: Gather your spud squad
The foundation of your potato patch starts with selecting the right seed potatoes. These aren’t your average grocery store potatoes! Look for certified seed potatoes from a garden center or online retailer. They’ll be disease-free and optimized for producing a high yield.
Choose the right potato variety for your container setup. Early maturing varieties are ideal for shorter growing seasons, while dwarf varieties are perfect for maximizing yield in smaller containers.
Inspect your seed potatoes carefully before planting. Discard any with wrinkles, blemishes, or signs of rot. You want healthy, firm potatoes with eyes (small sprouts) evenly distributed around the surface.
Pre-cut your seed potatoes (optional) to encourage faster sprouting. Use a clean, sharp knife to cut each potato into sections, each with 2-3 healthy eyes. Let the cut pieces air dry for a day or two before planting to allow the cut surfaces to callous over, preventing rot.
Step 2: Prepare your potato pot
Fill your chosen container with a potting mix specifically formulated for vegetables. These mixes are well-draining and provide the essential nutrients your potatoes need for optimal growth. Avoid using garden soil directly in containers, as it can retain too much moisture and lead to rot.
Pre-moisten the potting mix before planting. Aim for a consistently moist but not soggy texture.
Step 3: Plant your spuds!
With your container prepped, it’s time to plant your seed potatoes. Depth is key here. Create planting holes 3-4 inches (8-10 cm) deep. For larger containers accommodating multiple plants, space the holes 8-12 inches (20-30 cm) apart.
Carefully place a seed potato section, eye side up, into each planting hole. Gently cover the potatoes with potting mix, ensuring all the eyes are buried.
Step 4: Watering,Temperature and aftercare
Give your newly planted potatoes a good watering to settle the soil. Throughout the growing season, aim to keep the potting mix consistently moist, but avoid waterlogging. Water deeply when the top inch of soil feels dry to the touch.
Sunlight is essential for healthy potato growth. Position your container in a location receiving at least 6-8 hours of direct sunlight daily.
As your potato plants grow, their stems may become leggy and flop over the edge of the container. This is perfectly normal! Hilling can help encourage additional tuber formation. Once the plants reach about 6 inches (15 cm) tall, gently mound additional potting mix around the base of the stems, burying the lower portion.
Ideal growing temperatures are between 60°F and 70°F. If temperatures exceed 80°F, consider shading your plants during the hottest parts of the day. In cooler climates, protect your potatoes from frost by moving containers indoors or covering them with frost cloths.
Step 5: Feeding your spud squad (optional)
While a good quality potting mix provides essential nutrients, you can give your potato plants a mid-season boost with a water-soluble fertilizer. Opt for a fertilizer formulated for vegetables, following the application instructions carefully.
Step 6: Sit back, relax, and watch your potato patch thrive!
With proper care, your containerized potato plants should flourish, rewarding you with a delicious harvest in a few short months. Stay tuned for the next chapter in your potato-growing adventure, where we’ll delve into the exciting world of harvesting your homegrown spuds!
Troubleshooting Common Problems with Container Potatoes
- Stunted Growth: Check for nutrient deficiency or insufficient water.
- Yellowing Leaves: Could indicate watering issues, pests, or disease.
- Poor Tuber Development: Ensure proper spacing and avoid excessive nitrogen.
- Sunscald & Greening: Cover tubers with soil to prevent exposure.
- Pests & Diseases: Handpick pests or use organic treatments as needed.
Additional Tips and Tricks for Successful Container Potato Gardening
- Variety Selection: Choose compact, early-maturing types like ‘Red Pontiac’ or ‘Yukon Gold Petite.’
- Container Size: Opt for containers of at least 5 gallons.
- Mulch: Use organic mulch to retain moisture and regulate temperature.
- Staggered Harvest: Harvest some potatoes early, letting others grow.
Harvesting Your Homegrown Potatoes

When is it time to harvest?
There’s no single answer to this question, as the ideal harvest time depends on the variety of potato you planted and your desired potato size. Here are some key indicators that your potatoes are ready to be unearthed:
- Plant maturity: Early maturing varieties can be harvested as early as 60-70 days after planting, while main season varieties may take 80-100 days. Refer to the information on the seed potato packet for your specific variety’s maturity timeframe.
- Dying foliage: As the potato plants mature, the leaves will begin to yellow and die back. This is a natural sign that the tubers underground are nearing maturity.
- Tuber size: If you’re eager to enjoy some new potatoes for a summer salad, you can carefully dig around the base of a plant to peek at tuber size. Generally, aim for potatoes that are at least 1-2 inches (2.5-5 cm) in diameter for best flavor and texture.
Harvesting Your Container Spuds
- Empty the container (optional): For larger containers, you can carefully tip the container on its side and gently tap it to loosen the soil. This may be the easiest method for larger pots.
- Dig and unearth: For smaller containers or if you prefer to keep the plant in the container, use a garden fork to carefully loosen the soil around the base of the plant. Dig down gently, feeling for the potatoes to avoid any unwanted nicks or bruises.
Once you’ve unearthed your potato bounty:
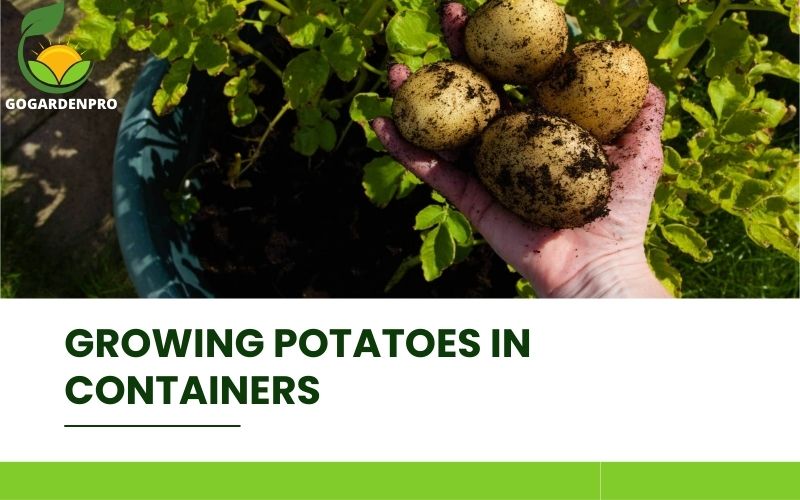
- Brush off excess soil: Gently brush off any loose soil clinging to the potatoes. Avoid washing them under running water, as this can remove the protective skin.
- Sort and store: Separate your potatoes into two categories: those you plan to enjoy soon (larger potatoes) and those you’d like to store for later use (smaller potatoes). Store potatoes in a cool, dark, well-ventilated location. A burlap sack or cardboard box placed in a basement or root cellar is ideal. Avoid storing potatoes near onions or apples, as they emit gasses that can accelerate spoilage.
FAQs about growing potatoes in containers

Can I grow different varieties of potatoes in containers?
Yes, you can grow different varieties including early, second early, and maincrop potatoes. The growing times will vary, with early varieties typically ready to harvest in 10 to 12 weeks, while maincrop can take up to 18 weeks.
What kind of container do I need for potatoes?
Choose a container that’s at least 5 gallons in size, with good drainage holes. Larger containers (10+ gallons) can produce a bigger harvest. Old buckets, storage bins, or even tires (with drainage) can work!
What type of potato is best for containers?
Opt for compact, early-maturing varieties like ‘Red Pontiac,’ ‘Yukon Gold Petite,’ or ‘Fingerling’ potatoes. These take up less space and mature faster.
What kind of soil do I need for container potatoes?
Use a well-draining potting mix, ideally formulated for vegetables. You can add some compost for extra nutrients.
How much sun do container potatoes need?
Aim for at least 6-8 hours of direct sunlight daily for optimal growth.
How often should I water my container potatoes?
Water deeply and consistently, allowing the top inch of soil to dry out between waterings. Avoid overwatering, which can lead to rot.
Do I need to fertilize my container potatoes?
A mid-season feeding with a water-soluble vegetable fertilizer can be beneficial, but follow the package instructions to avoid over-fertilizing.
How long does it take to grow potatoes in containers?
Early-maturing varieties can be ready in 60-70 days, while main season varieties take 80-100 days.
How do I harvest potatoes in containers?
Once the plants mature or tubers reach 1-2 inches in diameter, gently dig around the base to harvest.
Can I get a second harvest from my container potatoes?
Yes! After your initial harvest, cut away remaining stems, replenish potting mix, and water regularly. You might get a smaller second crop in a few weeks.
Conclusion
Thanks for exploring our guide on growing potatoes in containers at Gardening.com. We hope these insights help you cultivate healthy, plentiful potatoes in your own space. Happy gardening!

